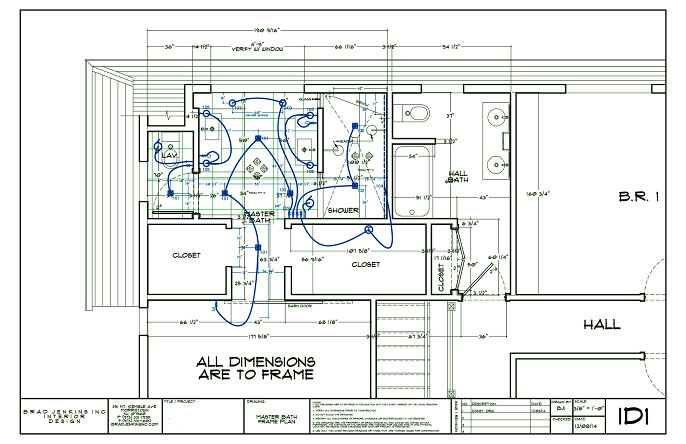
THE SECOND FLOOR: part 2 of a 2 part blog series illustrating how to transform a dated floor plan into a contemporary open-plan design. In part 1 we explored strategies to modify your home’s existing first floor plan to align more with your lifestyle. This part will mainly focus on how to update the second floor and master suite. You may want to start with part 1 if you have not done so.
In the first post we touched on the concept that “manipulating a floor plan is much like solving a puzzle. Generally speaking, when you implement a change to one area of the plan, you will affect another area of the plan. A balance must be struck. Compromises must be made.” In part 2 we will examine how the changes on the first floor have dramatically affected the second floor layout.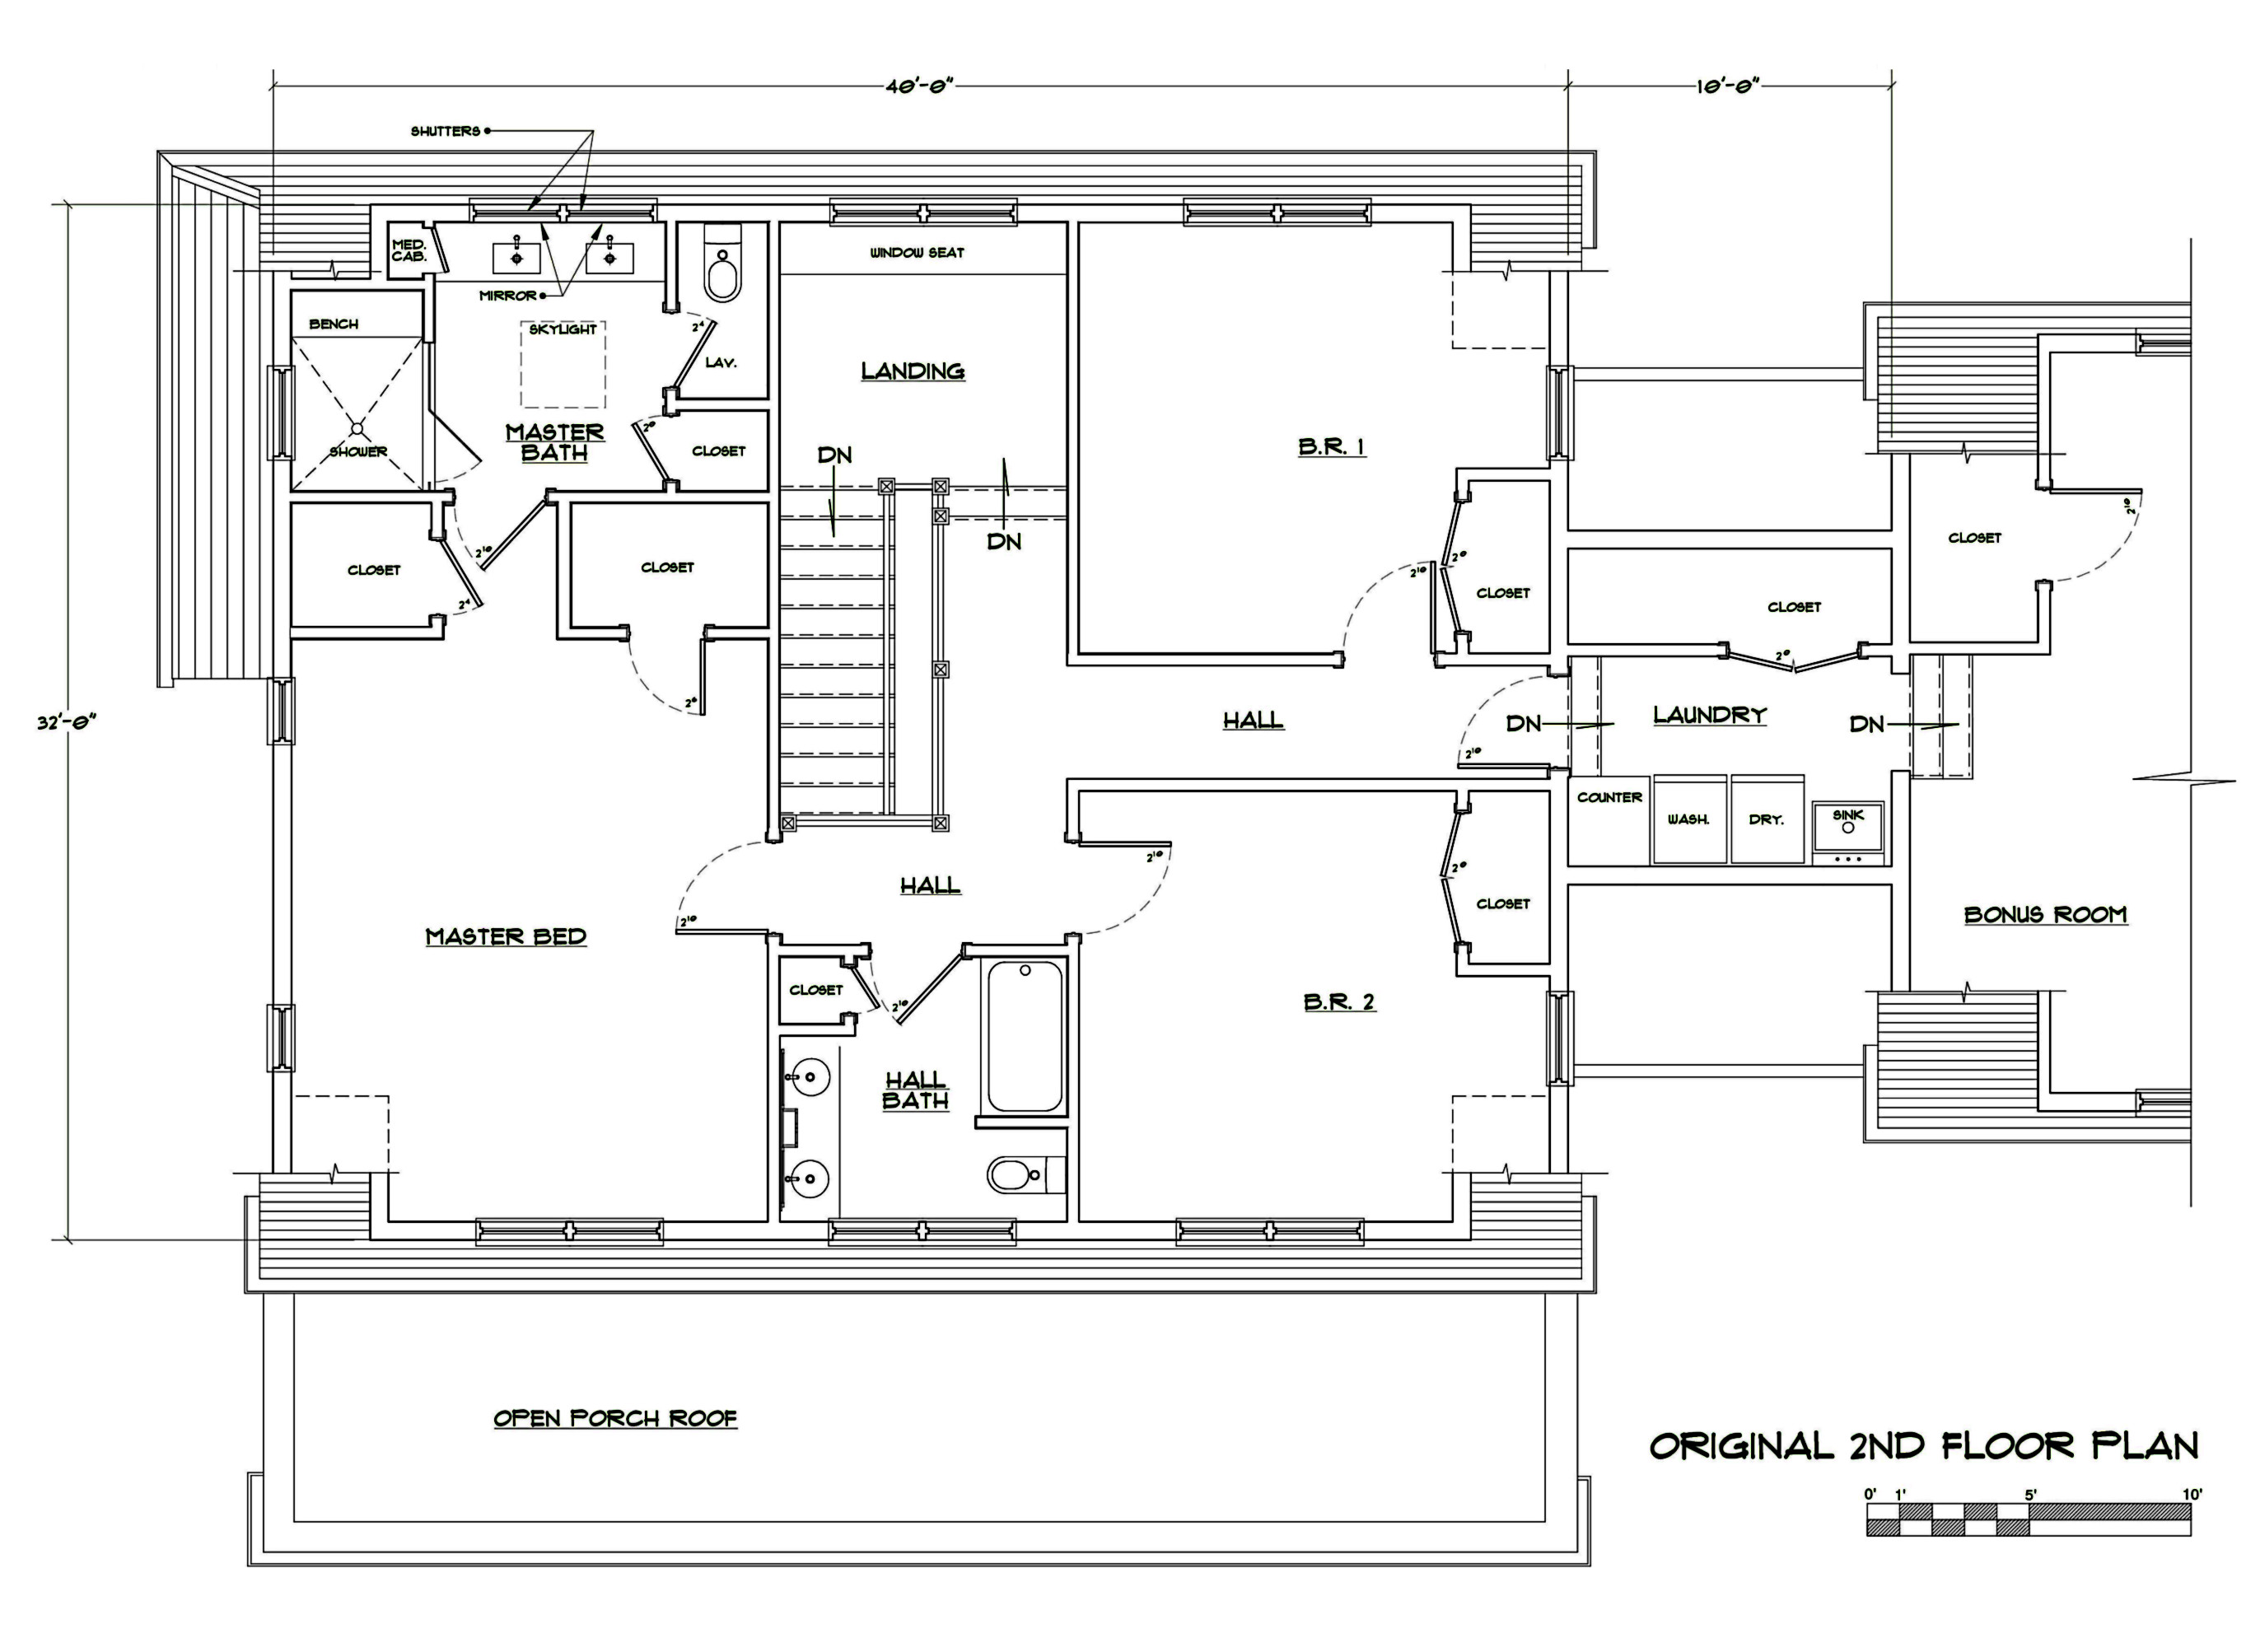
The wish list continues:
During the wish list phase mentioned in part 1 my client had identified a few other key items they aspired to update on the second floor. This is a nice simple concise list as in part 1. A list like this will make my job easy again. These items had much influence over my design decisions discussed in part 1.
- “More modern master suite layout”
- “Large shower for two”
- “More closet space”
- “Windows in the master bath at the back of the house”
Identify the issues
We elaborated on this list with some further discussion at the client-designer round table. The master bathroom will be my main focus and it has some real problems. First off, the space has too many doors, small spaces and closets. Secondly, the small shower is too enclosed and claustrophobic. Third, the sink vanity at the back of the home eliminates the possibility of natural light from large windows. The rear elevation of the home shows a set of fake shutters where the bathroom windows could go, however, this space is utilized by the vanity mirrors. Oddly enough, the fake shutters are supposed to balance out the other windows on the rear facade. Finally, what is that large landing space at the top of the stairs? Seems like a lot of wasted space?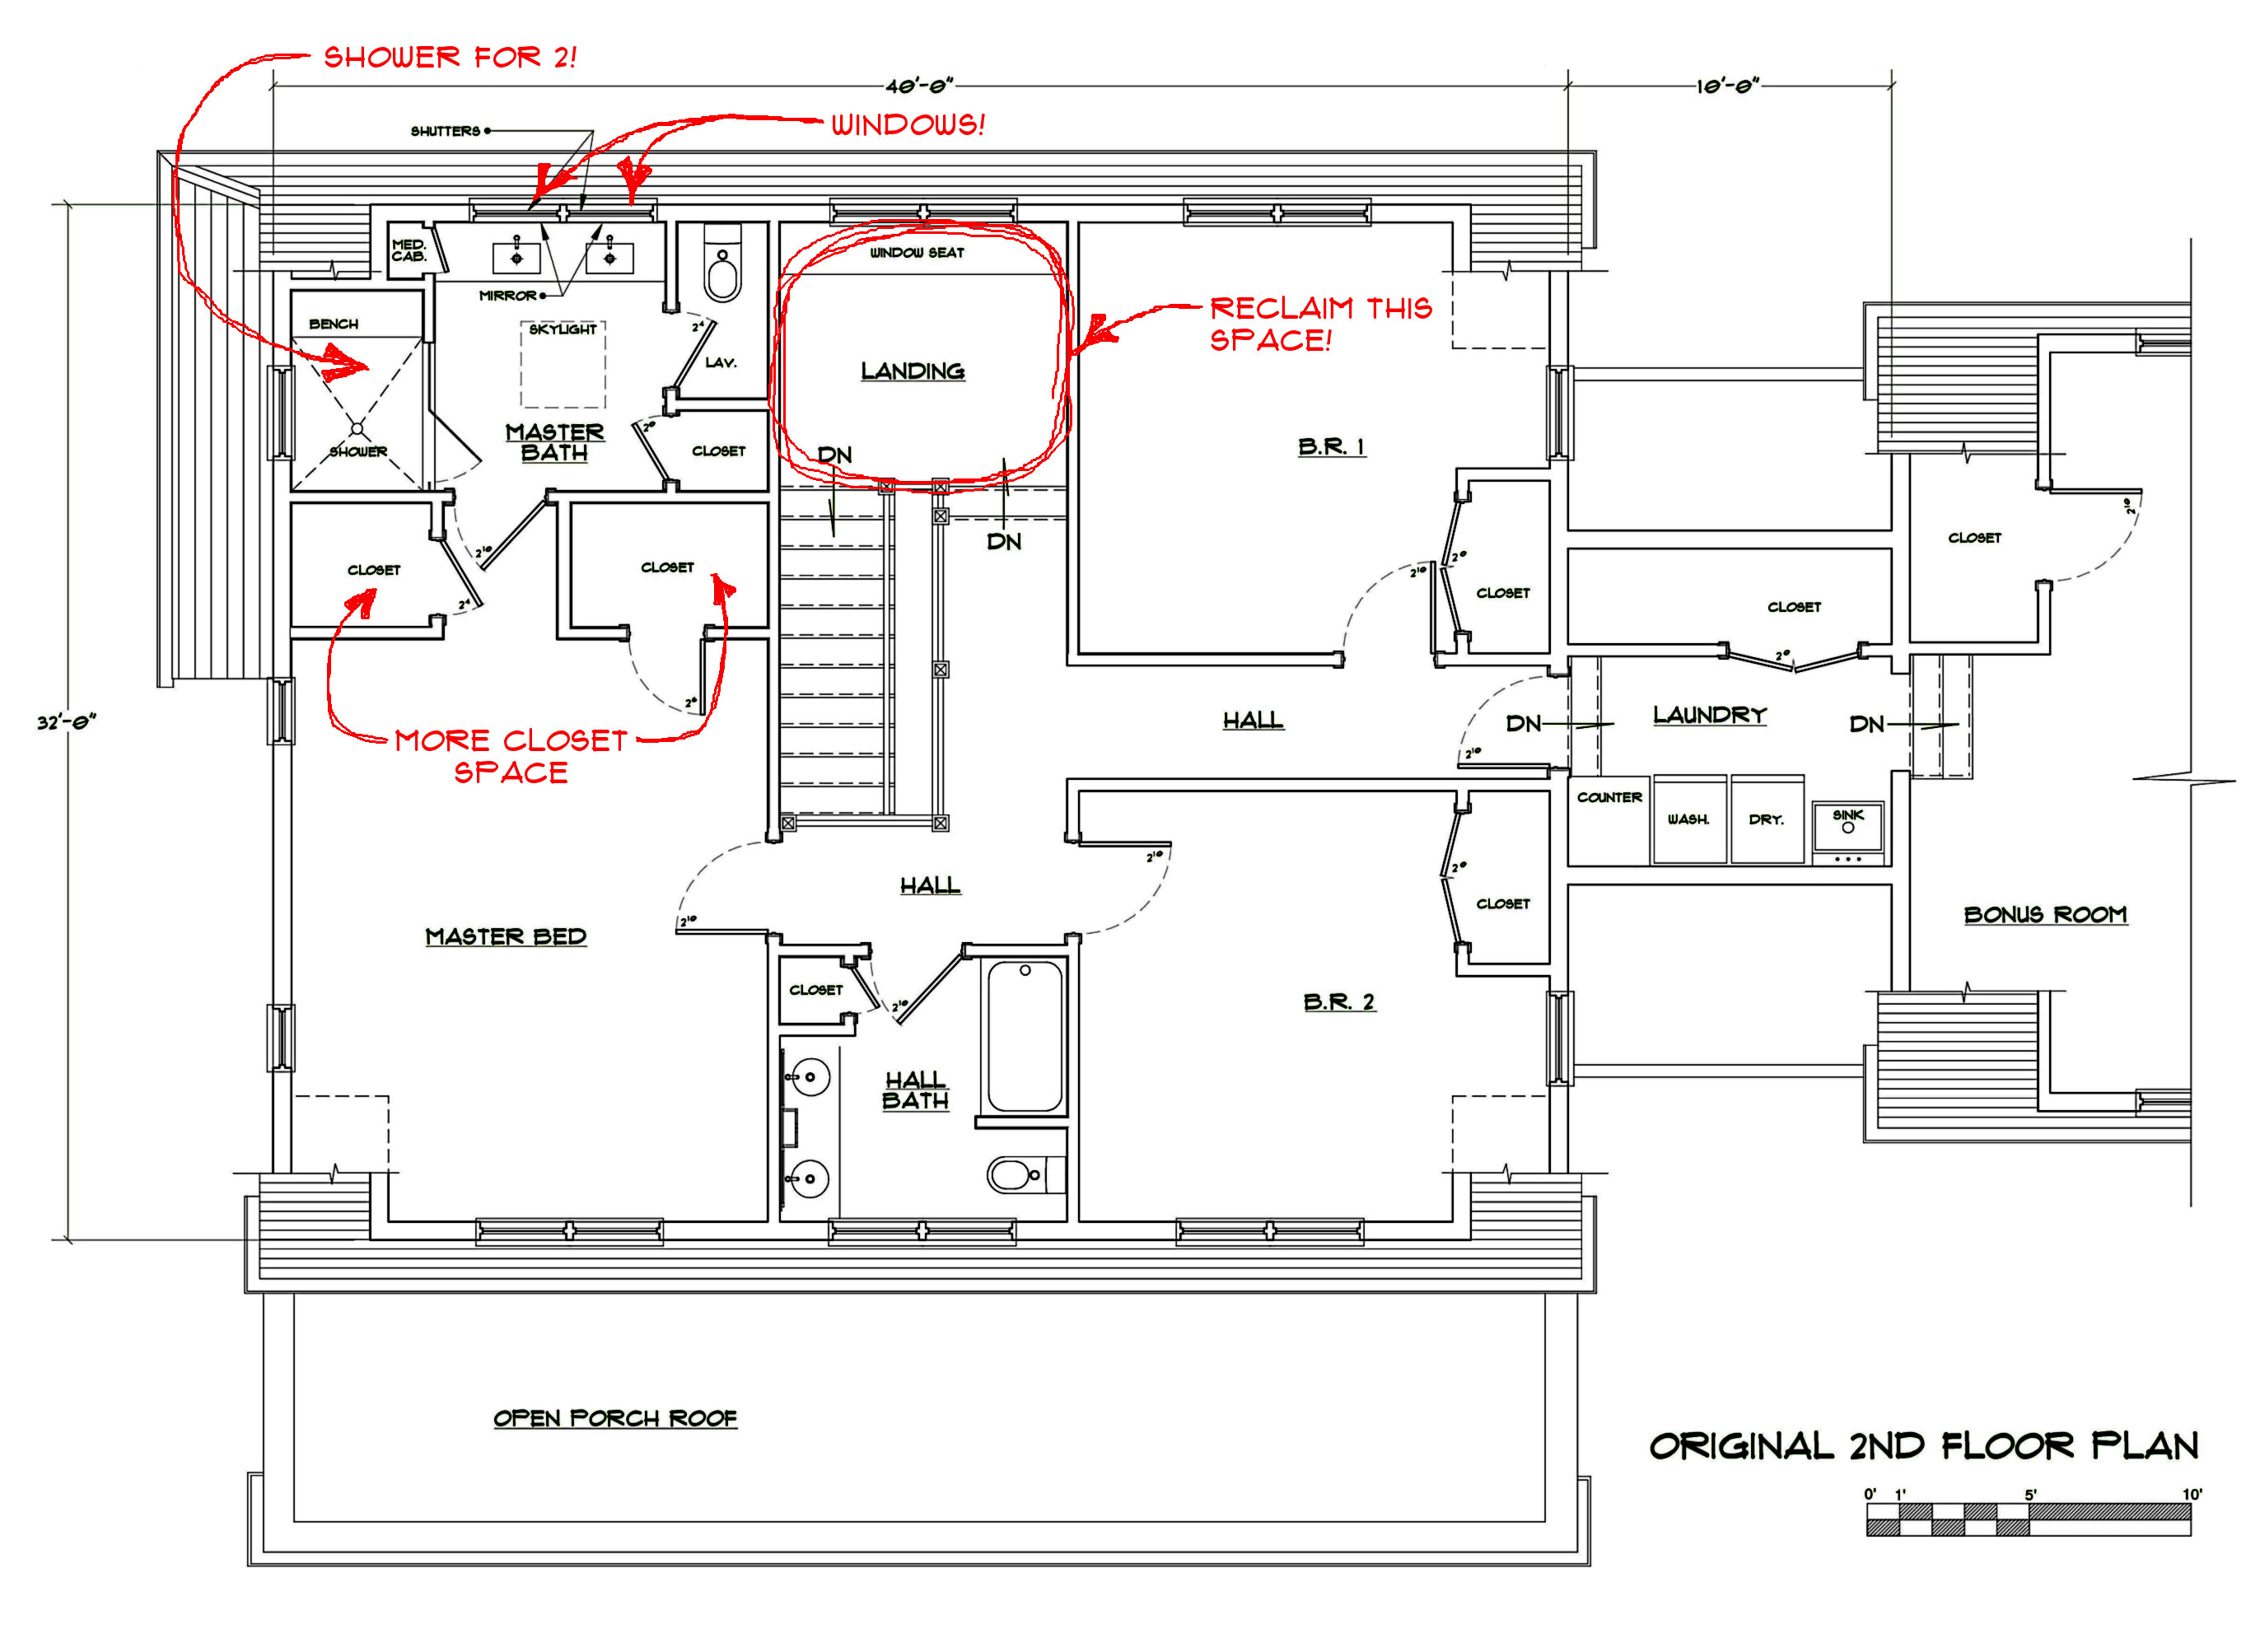
OK, so you read part 1 and you wondered why I flipped the stairs around?
I admit I have withheld some pertinent info on this one. Forgive me. The stair flip did have some positive impact on the first floor design; however, the real reason is here on the second floor. My client had decided that the master bath will remain at the back of the house. I need to come up with a few more square feet to implement the desired changes. Plus we have that giant piece of real estate contained in the second floor landing. Actually it’s a nice cozy spot for a book with the window seat. Honestly though, how often are you going to use that? The answer is not often enough. Flipping the stairs will allow me to reclaim a chunk of that landing space. You guessed it, that space is going to be added to the master bath and closets.
The big issue fix
The two risers (one step) on the landing will be added to the main stair run. This will move the landing into the same plane as the rest of the second floor. Now we can move things around! Flipping the stairs around will move the landing to the front of the house. Consequently I will move the hall bath to the back of the house. I am able to slim down the hall bath into a perfectly functional space and end up with a larger linen closet in the process. The master bathroom and walk in closet will gain the rest of the reclaimed floor space from the landing. 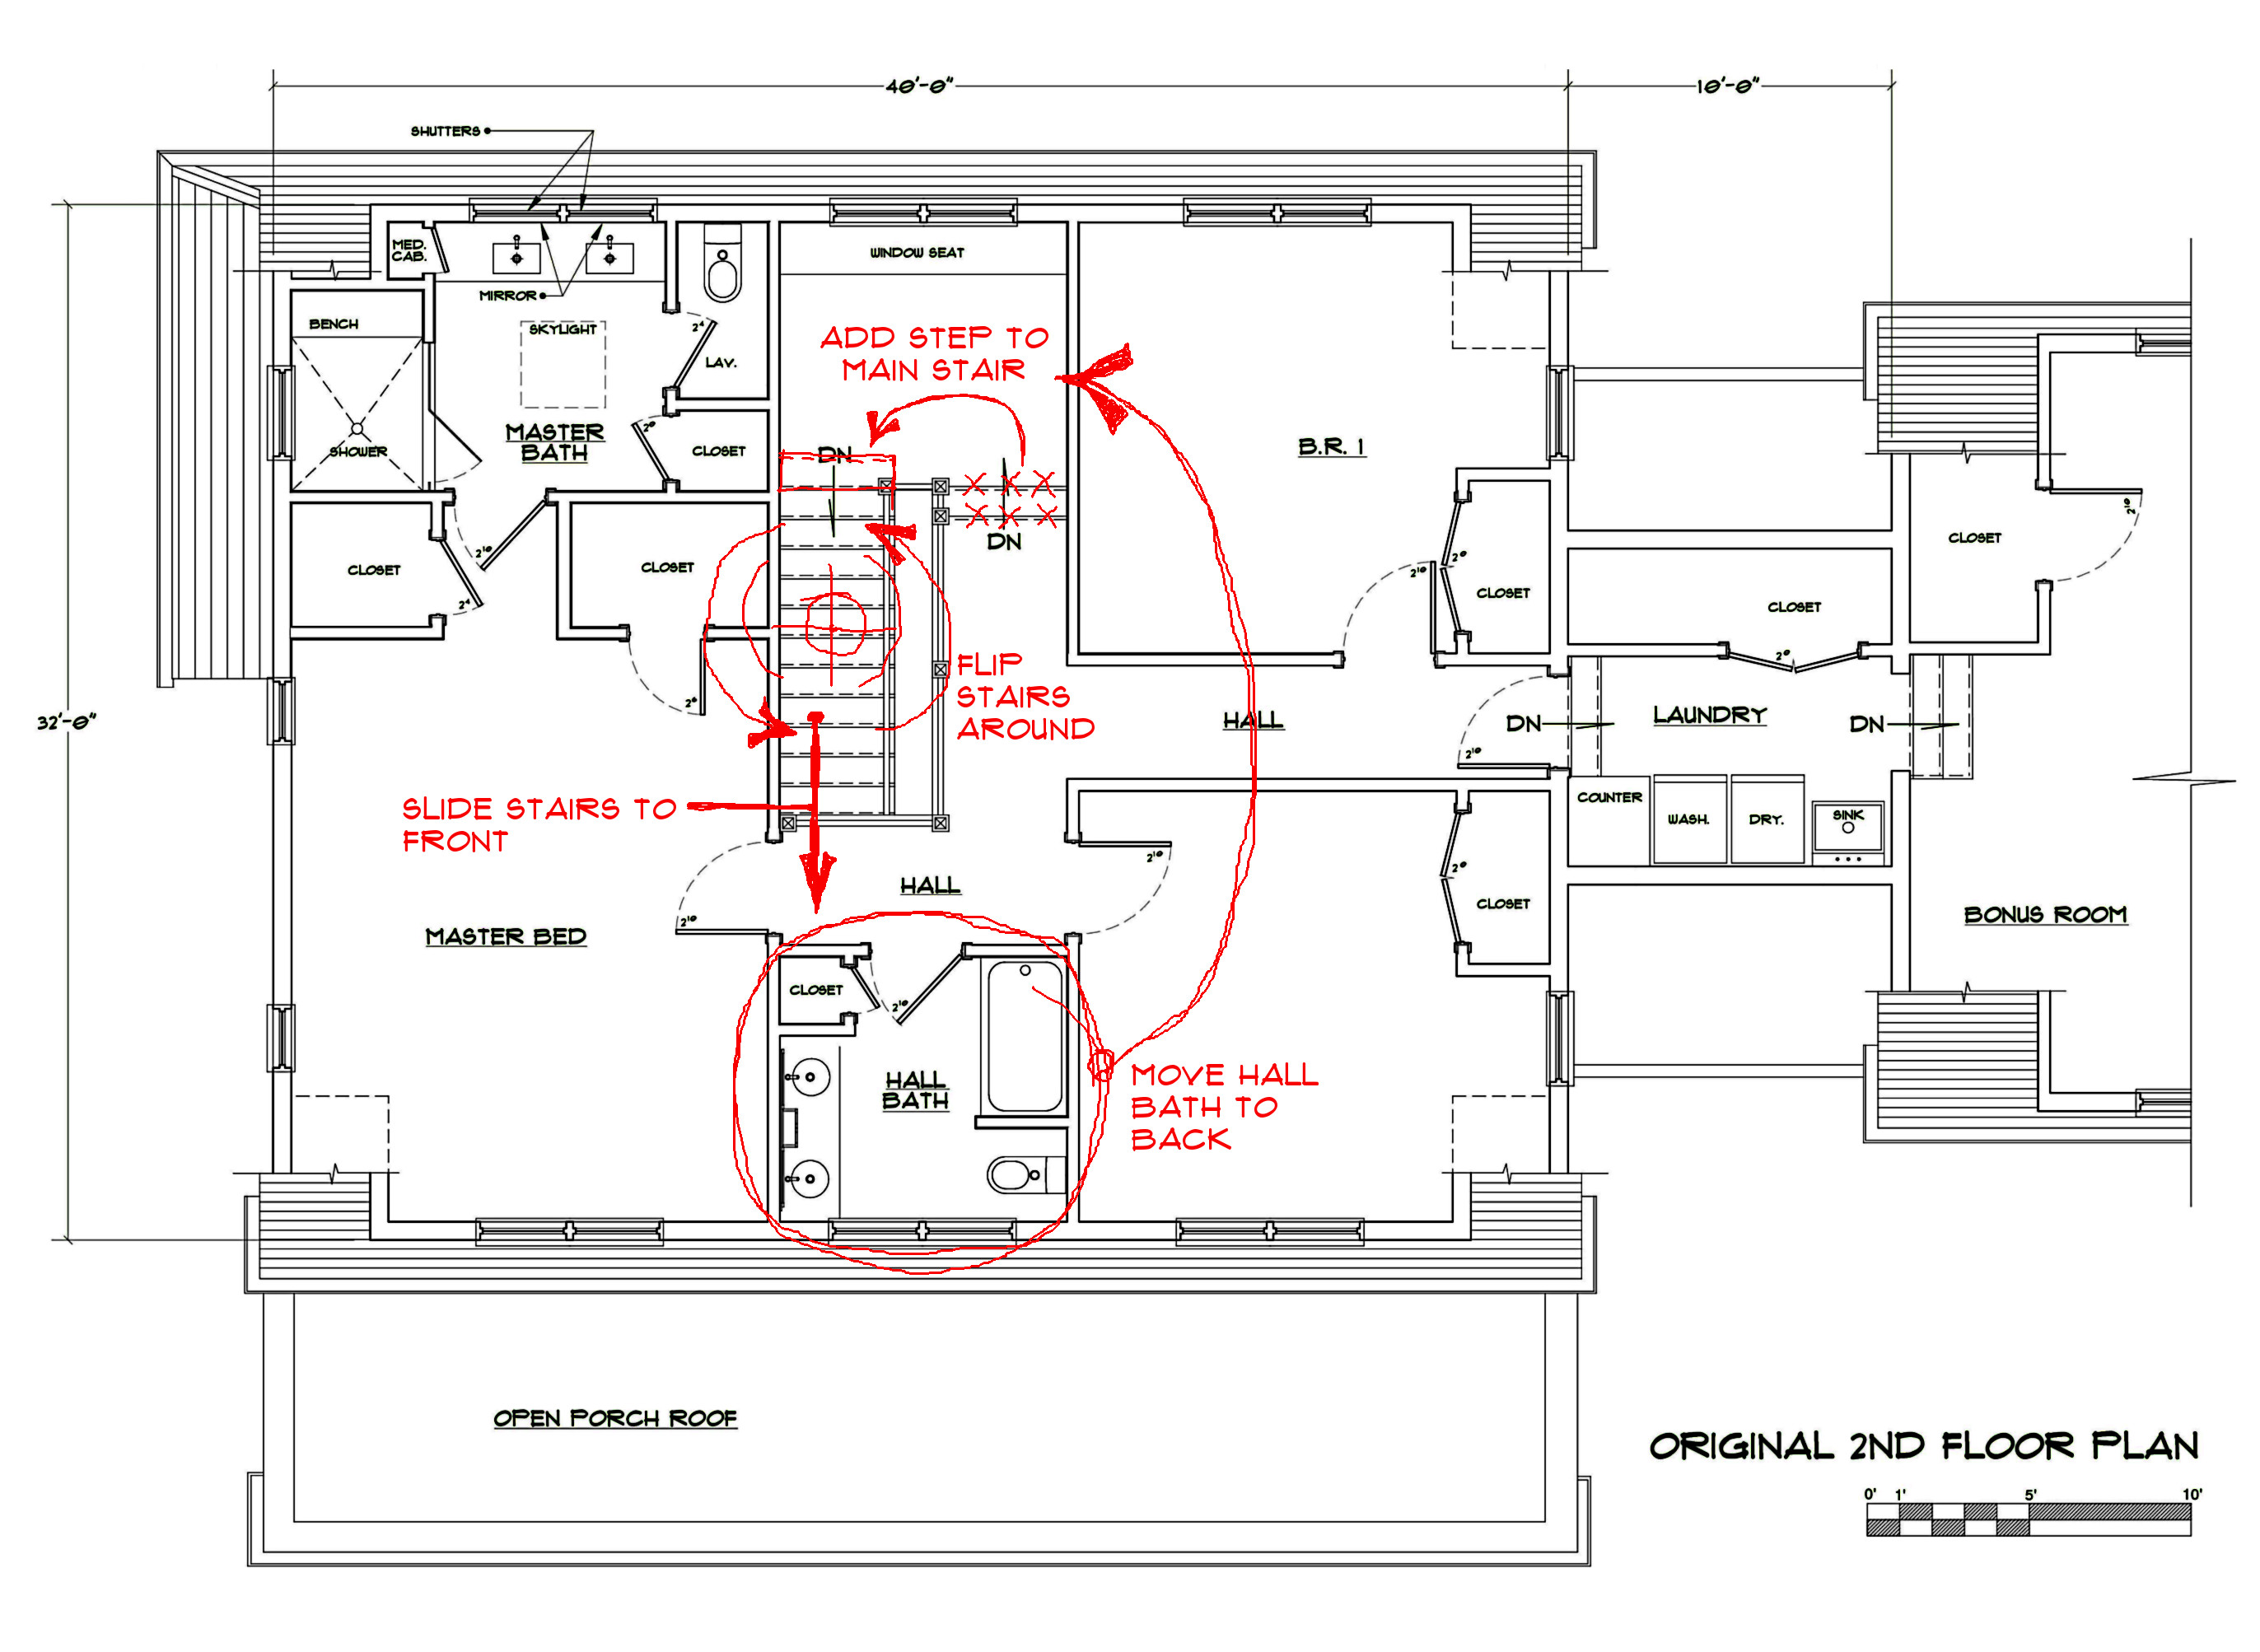
It all falls into place!
My first modification in the master bathroom will be the relocation of the toilet room to the other side of the space where the shower existed. Now the toilet room will occupy a relatively small and isolated footprint in the overall picture. Flipping the stairs has allowed me to widen the entire bathroom. This extra space will allow me to install his and hers vanities on the two inside walls. Freeing up the back exterior wall will allow the installation of two large windows. The extra square footage will also accommodate the much larger shower for two on the wish list. The shower is now sizeable and will not require a door; the feel will be very open. I will create a small sliver of glass at the back of the shower to let some natural light in.
The movement of the stairs has allowed me to make some enhancements to the walk in closets as well. The smaller closet on the Northwest side will inherit a bit of space. I will be able to center the hall leading from the bedroom to the bath. Finally, the large closet on the Southeast side will benefit from a large block of reclaimed space over the stairs.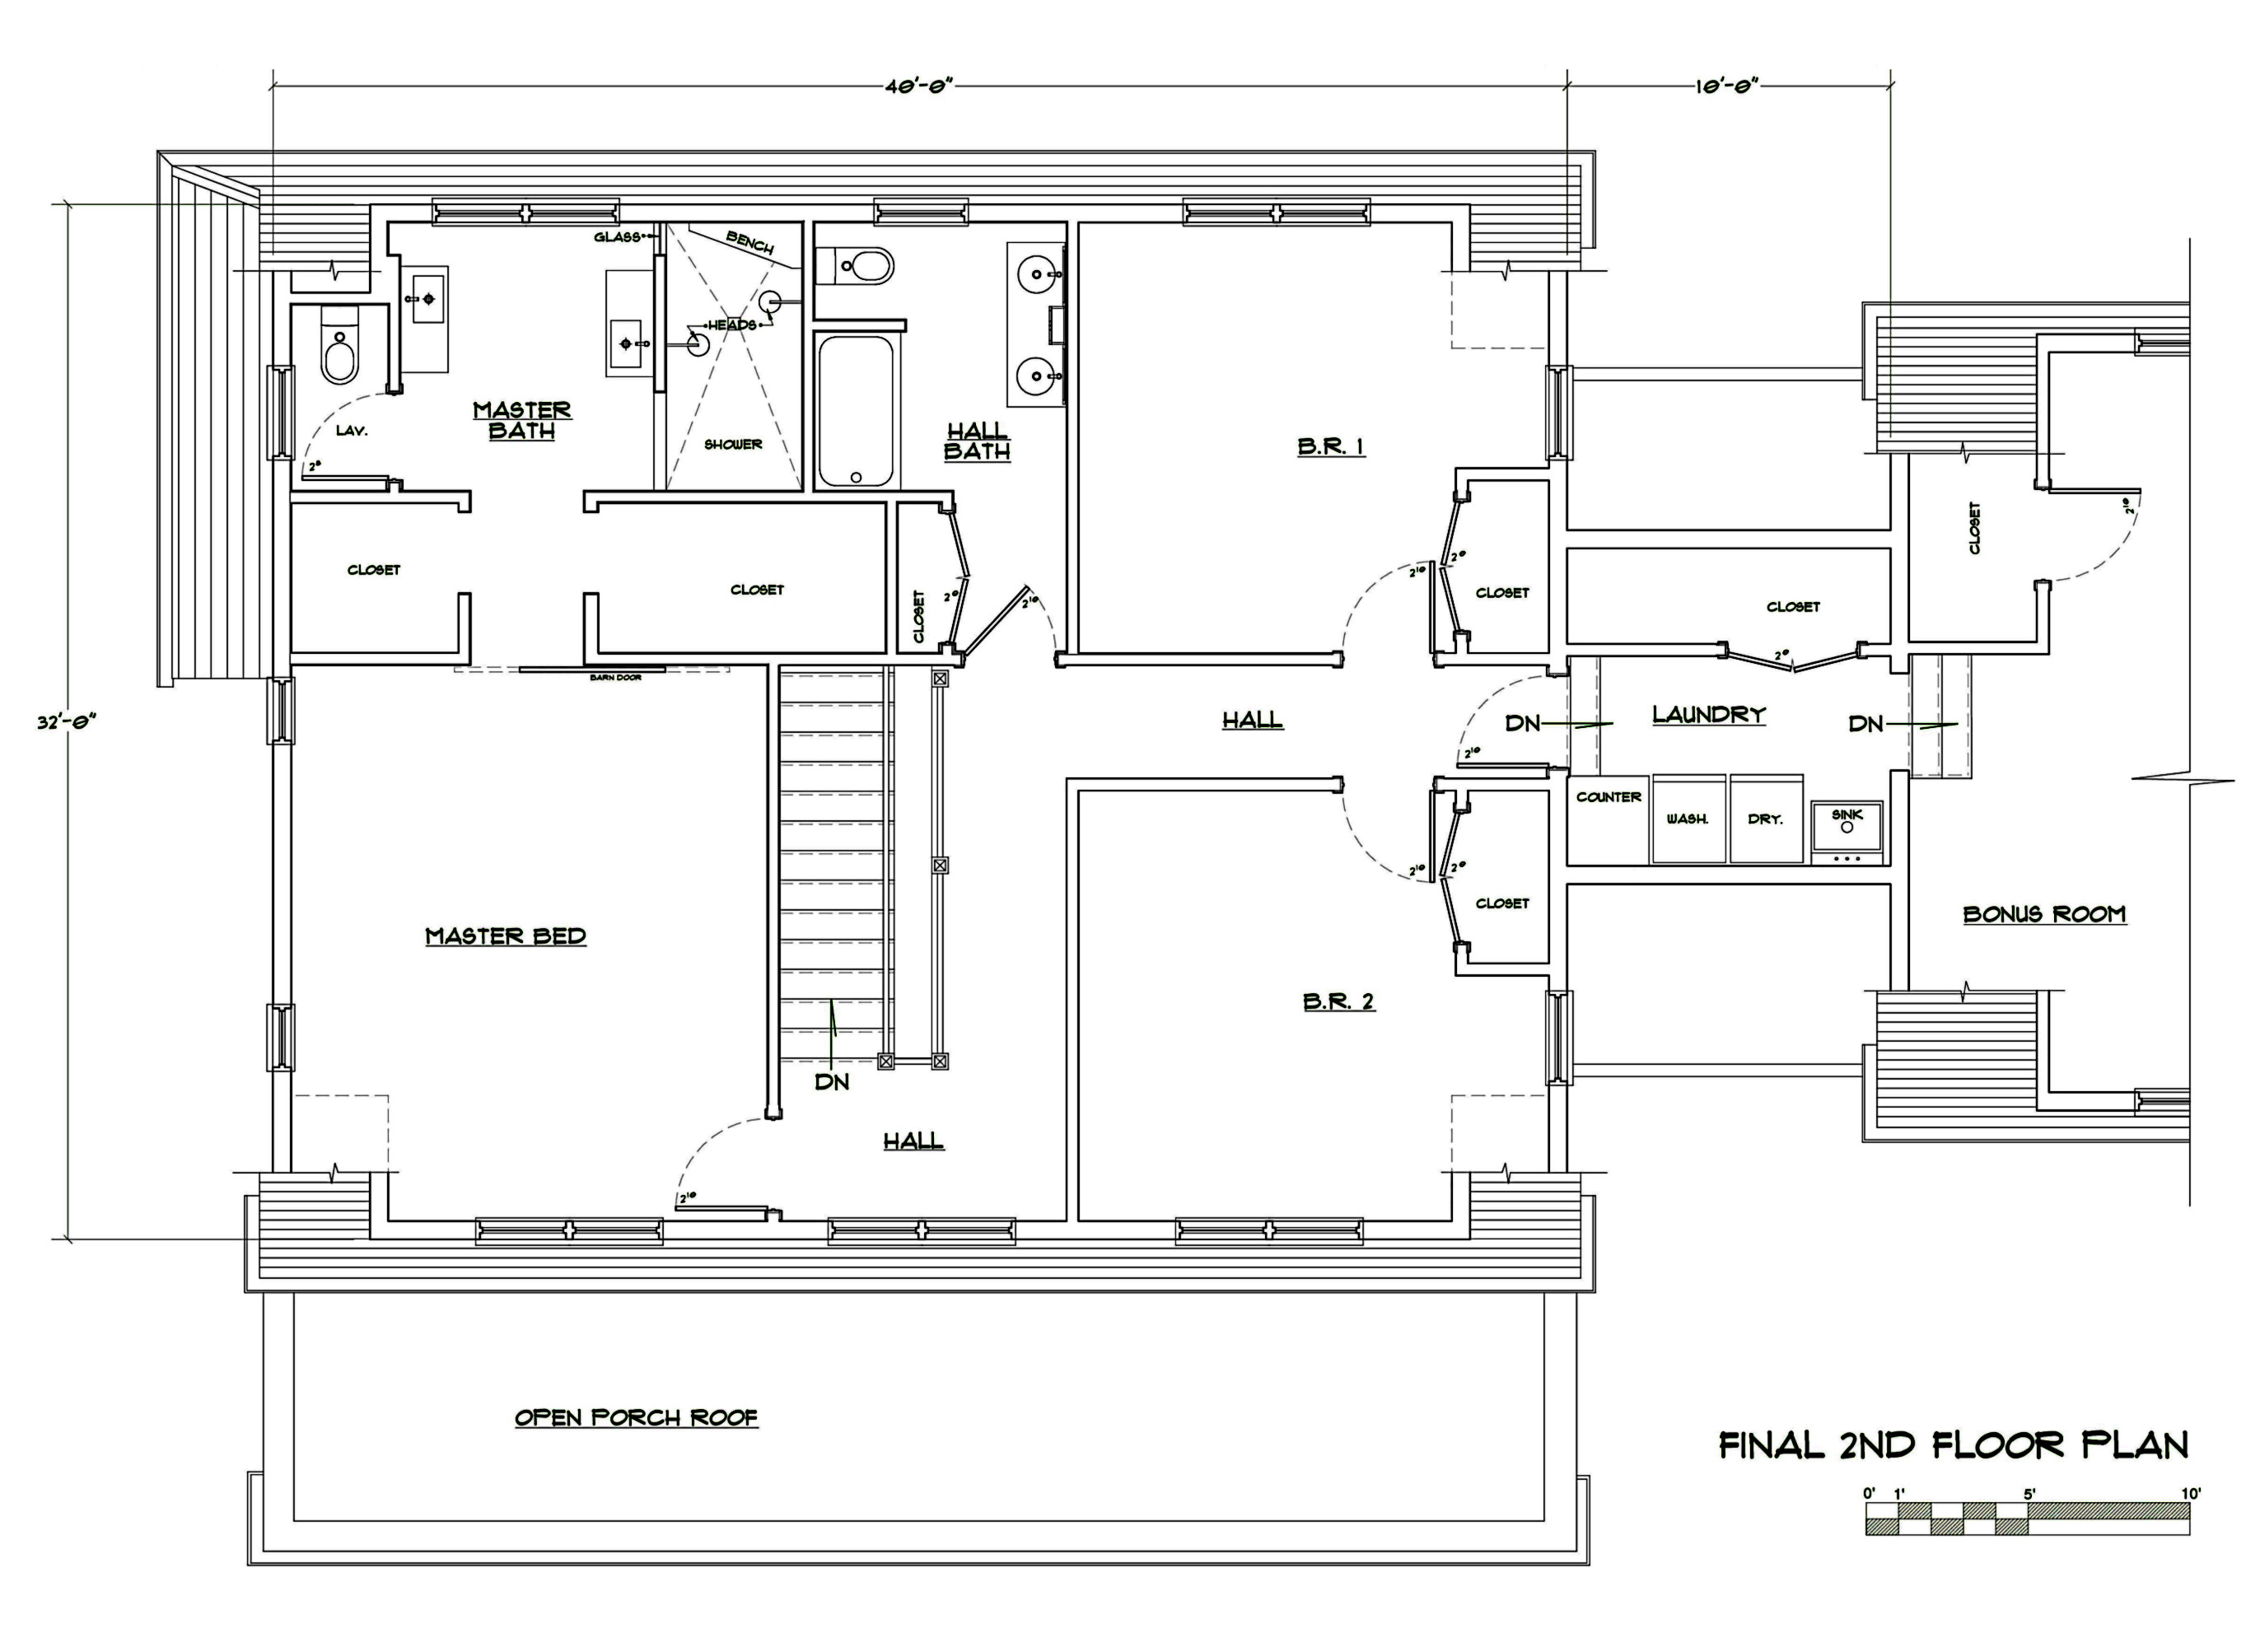
Be sure to check out the pictures of the finished Bernardsville Project
Part 1 and part 2 of this post have illustrated how one can improve on an existing floor plan with some simple tweaks. We were pretty much able to nail all of the wish list items. None of these improvements added to the cost of construction; except for the minimal cost of the two girders on the first floor. Obviously these changes all happened in unison. “Part 1 & part 2” was just a convenient way of making a very long post somewhat readable! As you can see, this is not rocket science; it’s just a process of problem solving. Another reason that I love what I do; every new client brings a unique puzzle to solve. HAPPY HOME BUILDING!
Please comment if you like (or dislike) the subject matter and format of this post. Based on your feedback I will either write more posts like this or will avoid them in the future! Anyways, thanks for reading.


I like this info! The issue we’ve run into even in new houses is that
people don’t always consider door swing direction.
Even my new house has doors that are badly planned.
Nice job!
Door swing is an easy detail to overlook. I once had a 4 gang switch bank end up behind a door. I paid for that one!